Creating objectives empowers organisations to establish a clear direction, foster alignment, and drive purposeful action towards their desired outcomes.
With Mesh Goals 2.0, we plan to introduce a simpler experience that helps you plan, create and align your objectives in a jiffy.
To create an Objective,
Step 1: Select the Goals module from the Performance tab on the homepage.
Step 2: Click on the Add new button.
Step 3: Select Objective.
The following form should open up.
Note: Mesh allows Admins to set custom names for objectives and key results. Hence, your company may have set a different nomenclature for objectives (such as “perspectives”, “goals” etc.) defined according to the company’s goal setting methodology. You can refer to this article to know more about setting customized goal setting methodologies on Mesh.
Step 4: Provide a Title to your objective to add clarity and focus to its purpose and facilitate effective communication and tracking. Mesh recommends setting specific objectives that are relevant to company goals and which can be supported by measurable key results.
Step 5: Set a timeline to your goal to ensure they are time-bound and drive completion. You can choose between the various timelines defined by your organization in the dropdown that occurs on clicking on the Timeline field.
Step 6: Alignment of objectives ensures cohesive pursuit of goals and vision. Align your objective with a parent objective or place the new objective at the parent level.
Note: Depending on the goal setting methodology of your company, objectives can be aligned either to other objectives, or to other objectives as well as key results. You can refer to our article on Goal Setting Methodologies on Mesh for further details.
Also, depending on the Access Control settings followed by your organization, aligning an objective may be a mandatory step for objective creation.
Thus, you may not be able to create objectives without aligning them to a parent goal.
To align a goal, click on the Alignment field.
A list of goals along with the team of owners and collaborators working on the goal would be shown. You can expand a goal to see their child goals as well.
Select the goal that you wish to align to. You can also search for a goal using the Search bar at the top of the panel.
Click on Realign to align your objective to the selected goal.
Note: The details following this section depend on the type of objective defined in the goal setting methodology set by the Admins of your company. To know more about the different types of objectives on Mesh, refer to this article.
Step 7: Add owners to your goal by clicking on the Owner field. You can search and add multiple owners to a goal.
At this point, you can choose to either the save the goal, or dive into further details to define it at a more granular level. To save the goal, you can directly refer to Step 9 of this article.
To add further details;
Step 8: The other details for your goal are visible in the bottom half of the panel. These include the Visibility, Time Period, Collaborators, Level, Tracking type, Description, Tags etc.
Many of them carry certain default values to facilitate faster goal creation.
To change any of the same, click on Change Details.
Configure the visibility of the objective in the Visibility section. You can choose to make the objective available for Public viewership (throughout your company) or Private viewership (visible only to Owners, Collaborators and their Managers).
Assign the objective to Collaborators (if any), who would ideally be people assisting the owner in driving the objective.
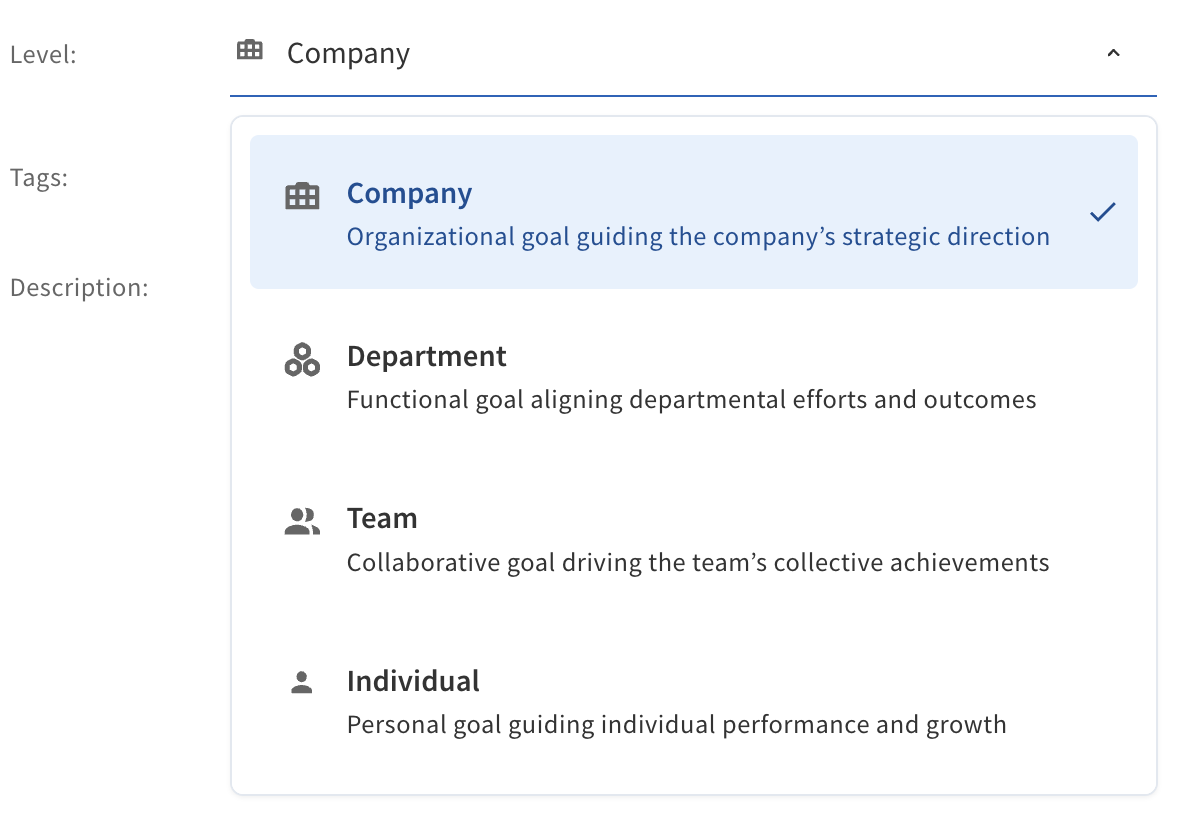
Choose the Level at which the objective should be placed. You can select between Company, Department, Team and Individual.

On selecting
Department, you can also choose the specific department that owns the objective, depending on the data integrated from your HRMS. To read more about HRMS integration, click
here.You can also add Tags to the objective that helps you categorize it when viewed in congregation with other objectives. To read more about adding and managing tags, refer to this article.
Finally, you can add a Description to the objective to add more context to the same.
Click on the Save button at the bottom right of the side panel to save your changes.
Step 9: In case you wish to save the objective,
- Click on the Save & Exit option in the bottom right of the main panel to save your objective.
If you wish to create more goals related to your objective, you can also click on the arrow at the end of the button to explore the following options:
- Save & Add Child Key Result → Adds a child key result that aligns to this objective
- Save & Add Child Objective → Adds a child objective that aligns to this objective
- Save & Add Objective → Adds another objective that is independent of this objective
Comments
0 comments
Please sign in to leave a comment.